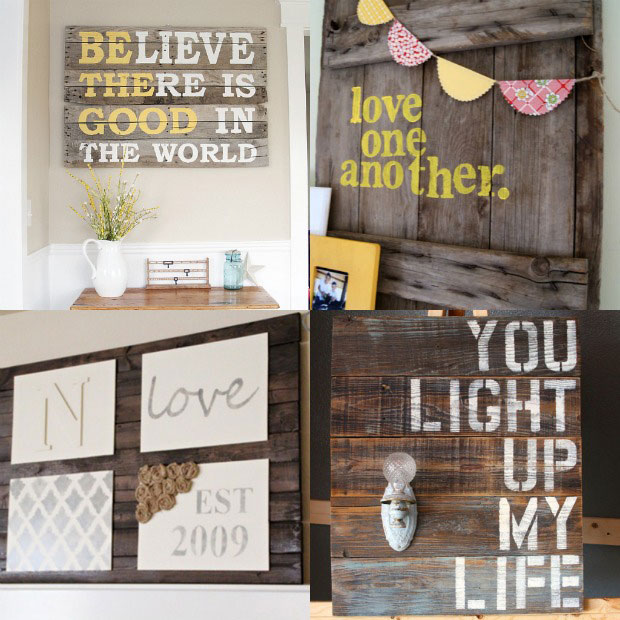
If you type into any search engine the word “pallet”, you are bound to find a plethora of inspirational creations! Pallet projects have been incredibly popular for the last several years and continue to trend on Pinterest and popular blogs. With the continued popularity of reclaimed wood, pallets offer a cheap (and often free) material source for avid DIY’ers everywhere. Below is a collection of cute pallet sign projects that are easy to make.
Would you like to create your own pallet DIY craft? Well then you are in luck because today I am going to show you step-by-step how to make a pallet sign for your wall!

Step 1: Find Your Wood
Near dumpsters you can often find discarded pallets, or in the case of the picture below, discarded fence pieces. Another great resource to find free wood is Craigslist. Often, free pallets for the taking will be listed under the “free” section. If you still can’t find any, drive to your town’s industrial district and look for pallets near dumpsters. Just be warned that pallets are not the cleanest of woods and can carry bugs, bacteria, or be soaked in toxic pesticides. Do your research beforehand to determine if pallet crafts are for you.
Tip: One-time use pallet wood from the US that has been heat treated instead of treated with toxic chemicals will have a stamp on it that says “US HT”. The “HT” let’s you know that it was heat treated. Look for this but note that the wood may still have bacteria and other unsafe residues on the wood. Use at your own risk and always wear safety gear when sanding and cutting wood.

The wood for my “pallet” sign actually came from some old boards I was storing on the side of our house. After my experience with the bugs that shall not be named, I am honestly fearful of pallets and all the chemicals and potential bugs they might be harboring. I opted for wood that we had purchased for a previous project that I had left outside to weather.
Step 2: Clean Your Boards
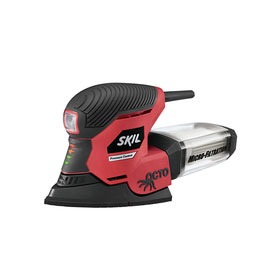
I asked everyone on my facebook page how best to clean the boards and received a myriad of answers from deck wash, bleach, to pressure washing. My boards weren’t in horrible shape and I wanted to keep the weathered look, so I just sanded my boards lightly with a palm sander. (Note: Wear a respirator when sanding to protect your lungs.) Below is the sander I own, the Skil 12000 Orbits per Minute Detail Power Sander. It’s not fancy and only costs around $40 and has some design flaws, but so far it’s worked great for small projects.
Step 3: Measure and Cut Your Boards
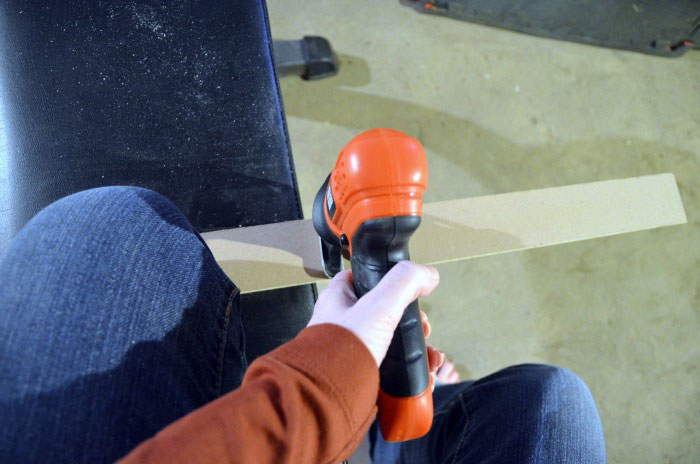
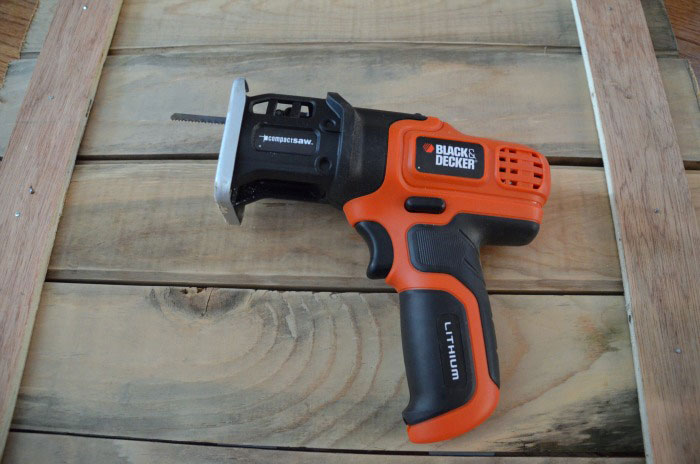
The size of your sign might just be determined by how much wood you have to work with! My boards were 1″x4″x8′, so I divided each board by three so that I had six boards in my sign. To cut the boards, I used my jigsaw but you could use your miter saw, or a simple miter box will work. (Note: I’m faking the picture for you below. I’m not left handed and this isn’t the board I used in my sign. I just thought you might like a visual of cutting here.)
If you are doing a smaller project like this one, there is no need to bust out the big guns. I LOVE my little jigsaw and use it all the time. Jigsaws are especially great if you are a beginning DIY’er. They handle more like drills and the blades are small and less intimidating than chop saw blades.
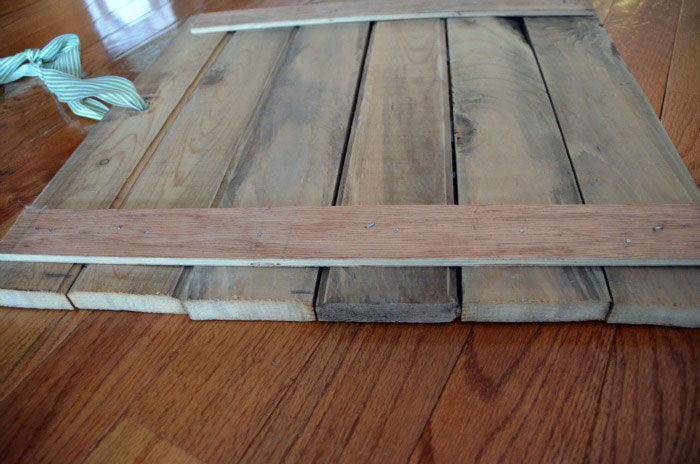
Step 4: Nail Your Boards
I found a piece of thin scrap wood in our basement, cut it to size and then nailed it in place using brads. I didn’t bother using any wood glue or going crazy with nails. This isn’t a piece of furniture that you have to worry about getting a lot of abuse so just use as many brads as it takes to secure the boards and call it done!
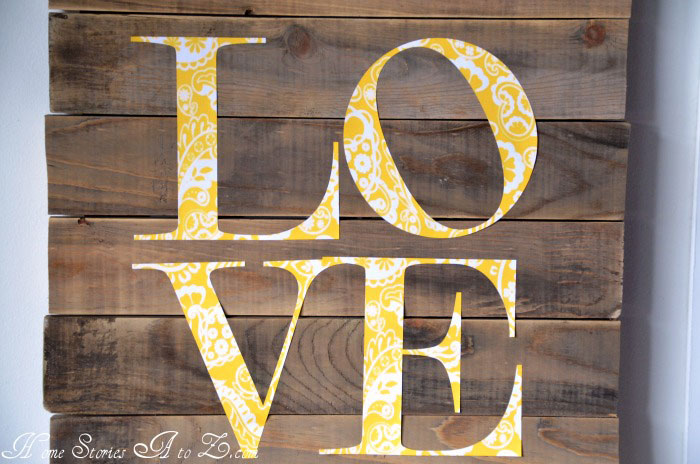
Step 5: Make It Pretty
I used my digital cutter to create the letters on some scrapbook paper. (The font is Modern No. 20 in case you were wondering.) I knew that I wanted to use my pallet sign for other projects, so I used stenciling adhesive spray (mine is Martha Stewart brand) to adhere the letters to the board. Stencil adhesive is wonderful! It’s non-permanent and the letters can be removed when I tire of them. If you want a more permanent pallet sign, use a stencil and acrylic paints to create a word or phrase for your sign.
Step 6: Hang Your Sign
To hang my sign, I lucked out that my board came with a knot-hole perfectly in the center. I deliberately placed this board at the top of my sign so that I could string a ribbon through it for hanging. If you don’t have such luck, you can drill a hole in the top center of your board. Or, you can use D-ring picture hangers on the back of your sign to hang it.
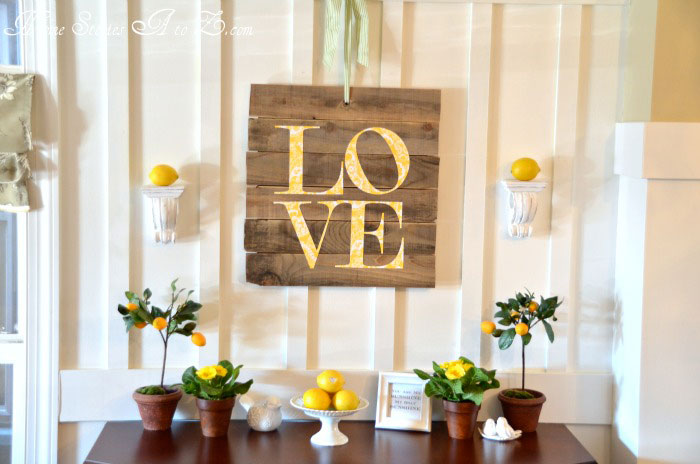
I’ll let you in on a little behind-the-scenes blogger secret as to why I wanted the letters on my pallet sign to be removable! Pallet signs make fantastic backdrops for photo shoots. Here are just a few times that my pallet sign has come in handy! (Please be sure your wood is safe before placing any food items on the wood.)

If you make your own pallet sign, we would love to see it! Show off your creation on the Homes.com Facebook page, tweet it to us on Twitter, or tag us on Instagram using @homesdotcom.